Spring boot用于快速构建可以独立运行的Spring应用程序。用来执行应用程序所需的各种后勤工作,我们只需要专注应用程序的代码。没有配置,没有web.xml, 没有应用服务器。
- 自动配置: 针对spring应用程序常见的应用功能,Spring boot能自动提供相关配置
- 起步依赖: 告诉Spring boot需要什么功能,它就能引入需要的库。
- 命令行界面:Spring boot的可选特性,借此你只需要写代码就能完成完成整的应用程序,无需传统项目构建
- Actuator:让你能够深入运行中的Spring Boot应用程序,一探究竟。
1 文档
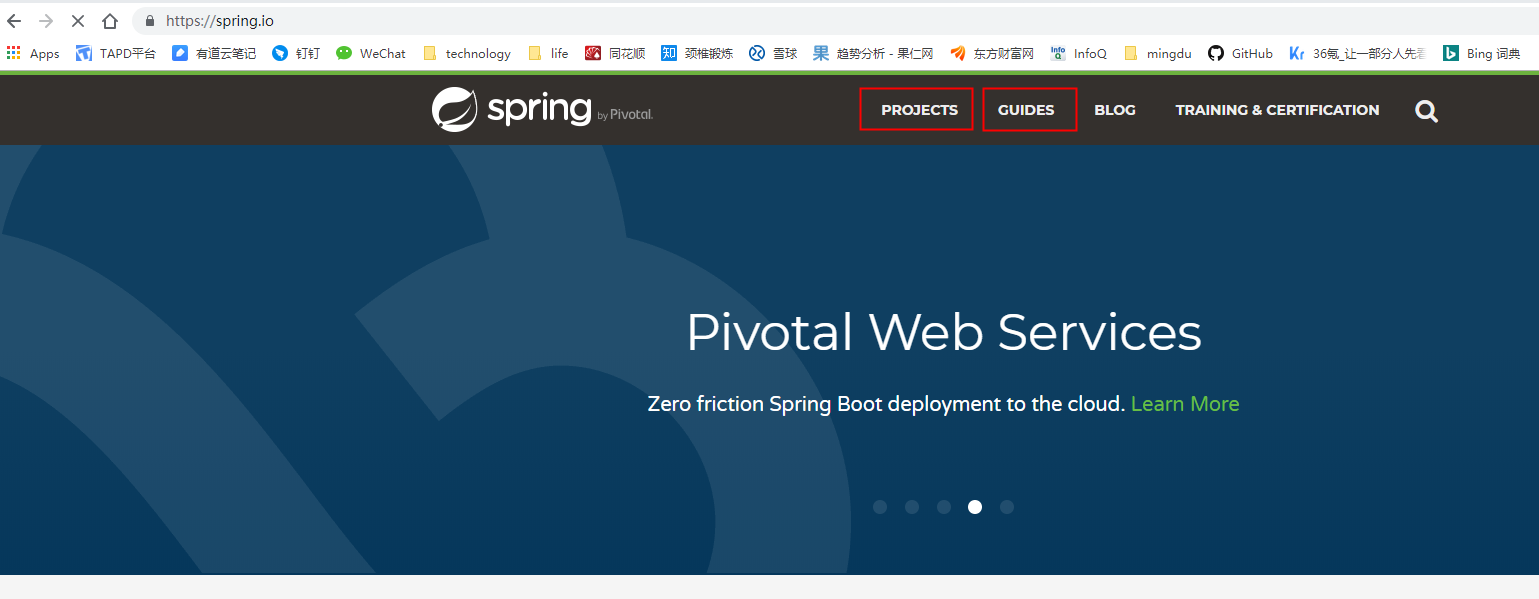
看官方文档最靠谱: https://spring.io/, 因为各个版本会有一些不同,根据对应的版本查看对应的文档是最稳妥,最省时间的方式。
官网首页有2个链接——“PROJECTS”和“GUIDES”, 这个2个链接分别对应spring每个项目的详细文档和用户指南。
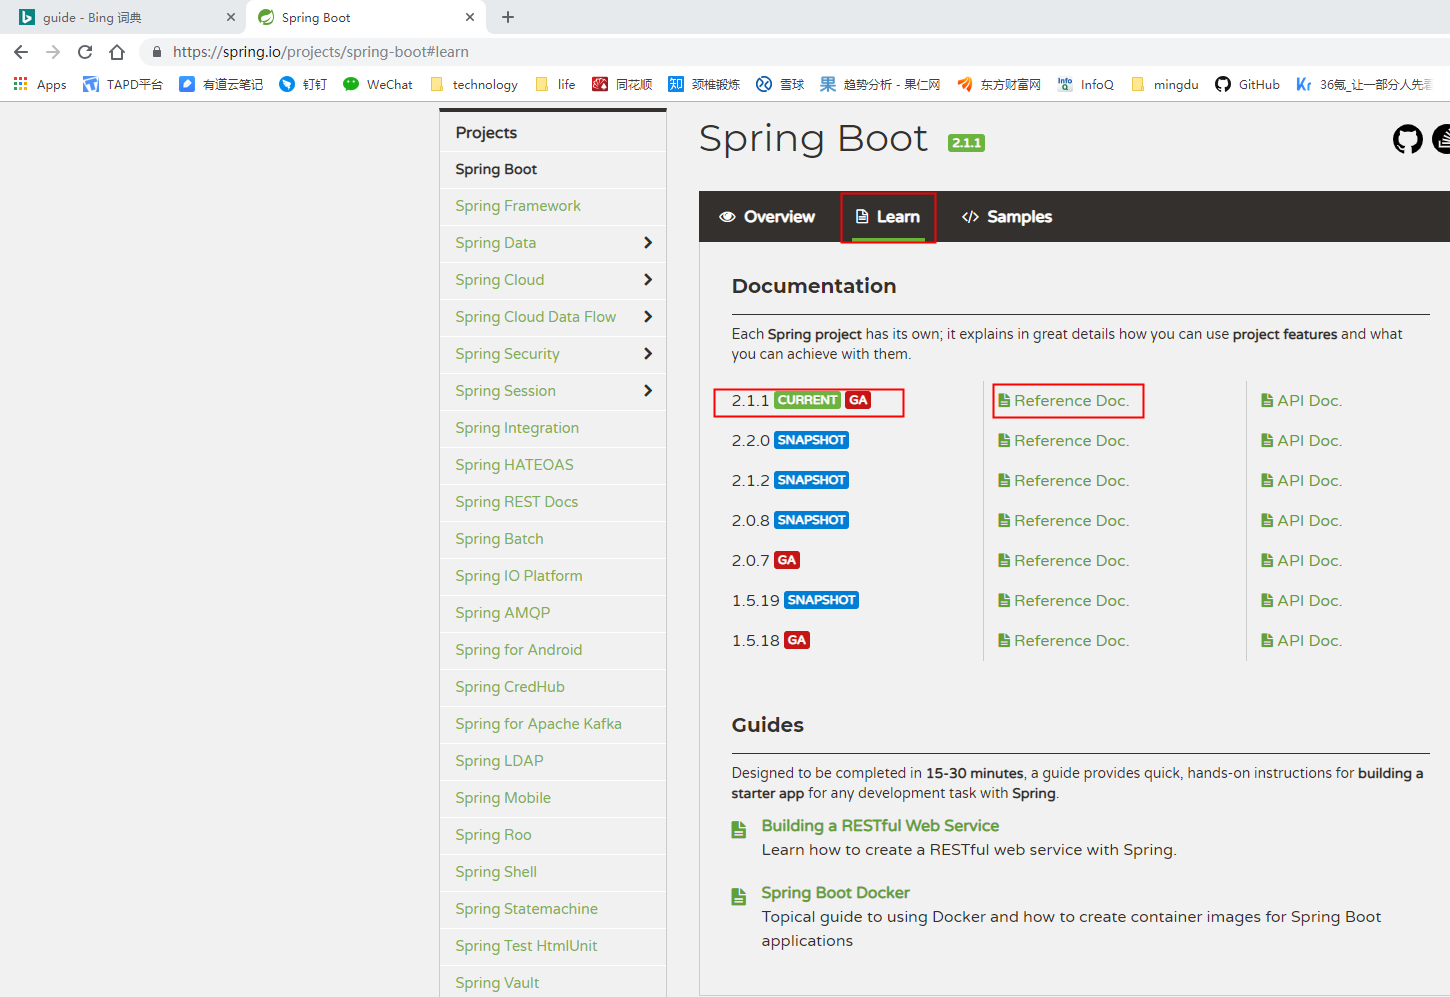
1.1 详细文档
点击“PROJECT”, 选择对应的模块,如Spring Boot, 再点击Learn, 就可以找到对应版本的详细文档。
1.2 用户指南
用户指南是设计都比较短小,作为入门非常方便。
1.3 自动配置
Spring Boot会为这些常见配置场景进行自动配置,如果Spring Boot在应用程序的Classpath里发现H2数据库的库,那么它就自动配置一个嵌入式H2数据库。如果在Classpath里发现JdbcTemplate, 那么它还会为你配置一个JdbcTemplate的Bean。 无需操心哪些Bean的配置,Spring Boot会做好准备,随时都能将其注入到你的Bean里。
1.4 起步依赖
起步依赖其实就是特殊的Maven依赖和Gradle依赖,利用了传递依赖解析,Spring boot把常用库聚合在一起,组成了几个为特定功能而定制的依赖。
假设你正在用Spring MVC构造一个REST API,并将JSON(JavaScript Object Notation)作为资源表述。此外,你还想运用遵循JSR-303规范的声明式校验,并使用嵌入式的 Tomcat服务器来提供服务。要实现以上目标,你在Maven或Gradle里至少需要以下8个依赖:
1
2
3
4
5
6
7
8
org.springframework:spring-core
org.springframework:spring-web
org.springframework:spring-webmvc
com.fasterxml.jackson.core:jackson-databind
org.hibernate:hibernate-validator
org.apache.tomcat.embed:tomcat-embed-core
org.apache.tomcat.embed:tomcat-embed-el
org.apache.tomcat.embed:tomcat-embed-logging-juli
如果使用Spring Boot的起步依赖,你只需添加Spring Boot的Web起步依赖
1
compile "org.springframework.boot:spring-boot-starter-web"
仅此一个。它会根据依赖传递把其他所需依赖引入项目里,你都不用考虑它们。
比起减少依赖数量,起步依赖还引入了一些微妙的变化。向项目中添加了Web起步依赖,实 际上指定了应用程序所需的一类功能。因为应用是个Web应用程序,所以加入了Web起步依赖。 与之类似,如果应用程序要用到JPA持久化,那么就可以加入jpa起步依赖。如果需要安全功能, 那就加入security起步依赖。简而言之,你不再需要考虑支持某种功能要用什么库了,引入相关起 步依赖就行。 此外,Spring Boot的起步依赖还把你从“需要这些库的哪些版本”这个问题里解放了出来。 起步依赖引入的库的版本都是经过测试的,因此你可以完全放心,它们之间不会出现不兼容的 情况。
Spring Boot起步依赖基本都以spring-boot-starter打头,随后是直接代表其功能的名字,比如web、test。
1.5 命令行界面
Spring Boot CLI利用了起步依赖和自动配置,让你专注于代码本身。CLI能检测到你使用了哪些类,它知道要向Classpath中添加哪些起步依赖才能让它运转起来。一旦那些依赖出现在Classpath中,一系列自动配置就会接踵而来,Spring Boot CLI是Spring Boot的非必要组成部分。虽然它为Spring带来了惊人的力量,大大简化了开发,但也引入了一套不太常规的开发模型。要是这种开发模型与你的口味相去甚远,那也没关系,抛开CLI,你还是可以利用Spring Boot提供的其他东西。
1.6 Actuator
提供在运行时检视应用程序内部情况的能力。安装了Actuator就能窥探应用程序的内部情况 了,包括如下细节:
- Spring应用程序上下文里配置的Bean
- Spring Boot的自动配置做的决策
- 应用程序取到的环境变量、系统属性、配置属性和命令行参数
- 应用程序里线程的当前状态
- 应用程序最近处理过的HTTP请求的追踪情况
- 各种和内存用量、垃圾回收、Web请求以及数据源用量相关的指标
Actuator通过Web端点和shell界面向外界提供信息。如果要借助shell界面,你可以打开SSH (Secure Shell),登入运行中的应用程序,发送指令查看它的情况。
从本质上来说,Spring Boot就是Spring,它做了那些没有它你自己也会去做的Spring Bean配置。有了Spring boot,你不用再写这些样板配置了,可以专注于应用程序的逻辑。
1.7 Spring initializer
Spring Initializr从本质上来说就是一个Web应用程序,它能为你生成Spring Boot项目结构。虽 然不能生成应用程序代码,但它能为你提供一个基本的项目结构,以及一个用于构建代码的 Maven或Gradle构建说明文件。你只需要写应用程序的代码就好了。 Spring Initializr有几种用法:
- 通过Web界面使用,生成链接
- 通过Spring Tool Suite使用。
- 通过IntelliJ IDEA使用。
- 使用Spring Boot CLI使用。
2 Spring Boot项目
2.1 Spring 项目
@SpringBootApplication                                         //开启组件扫描和自动配置
public class Application {

    public static void main(String[] args) {
        SpringApplication.run(ProxyApplication.class, args);   //负责启动引导应用程序
    }

}
@SpringBootApplication开启了Spring的组件扫描和Spring Boot的自动配置功能。实际 上,@SpringBootApplication将三个有用的注解组合在了一起。
- Spring的@Configuration:标明该类使用Spring基于Java的配置。虽然本书不会写太多配置,但我们会更倾向于使用基于Java而不是XML的配置。
- Spring的@ComponentScan:启用组件扫描,这样你写的Web控制器类和其他组件才能被自动发现并注册为Spring应用程序上下文里的Bean。本章稍后会写一个简单的Spring MVC控制器,使用@Controller进行注解,这样组件扫描才能找到它。
- Spring Boot的@EnableAutoConfiguration : 这个不起眼的小注解开启了Spring Boot自动配置的魔力,让你不用再写成篇的配置了。
Application还是一个启动引导类。要运行Spring Boot应用程序有几种方式,其中包含传统的WAR文件部署。但这里的main()方法让你可以在命令行里把该应用程序当作一个可执行JAR文件来运行。这里向SpringApplication.run()传递了一个Application类的引用,还有命令行参数,通过这些东西启动应用程序。
3 自动配置
Spring Boot为Gradle和Maven提供了构建插件,以便辅助构建Spring Boot项目。
1
2
3
4
5
6
7
8
9
10
11
12
13
14
15
16
17
18
19
20
21
22
23
24
25
26
27
28
buildscript {
    ext {
        springBootVersion = '2.1.2.RELEASE'
    }
    repositories {
        mavenCentral()
    }
    dependencies {
        classpath("org.springframework.boot:spring-boot-gradle-plugin:${springBootVersion}")  //依赖Spring Boot插件
    }
}

apply plugin: 'java'
apply plugin: 'org.springframework.boot'                                                      //应用Spring Boot插件
apply plugin: 'io.spring.dependency-management'

group = 'com.example'
version = '0.0.1-SNAPSHOT'
sourceCompatibility = '1.8'

repositories {
    mavenCentral()
}

dependencies {
    implementation 'org.springframework.boot:spring-boot-starter-web'                      //起步依赖
    testImplementation 'org.springframework.boot:spring-boot-starter-test'
}
3.1 起步依赖
起步依赖 本质上是一个Maven项目对象模型(Project Object Model,POM),定义了对其他库的传递依赖,这些东西加在一起即支持某项功能。很多起步依赖的命名都暗示了它们提供的某种或某类功能,起步依赖是面向功能的。
Spring boot官方文档列出了所有起步依赖:https://docs.spring.io/spring-boot/docs/1.5.22.RELEASE/reference/html/using-boot-build-systems.html#using-boot-starter
查看依赖树:
1
gradle dependencies
3.2 覆盖起步依赖
起步依赖是通过构建工具中的功能,可以选择性地覆盖它们引入的传递依赖的版本号,排除传递依赖,当然还可以为那些Spring Boot起步依赖没有涵盖的库指定依赖。 以Spring Boot的Web起步依赖为例,它传递依赖了Jackson JSON库。如果你正在构建一个生产或消费JSON资源表述REST服务,那它会很有用。但是,要构建传统的面向人类用户的Web应用程序,你可能用不上Jackson。虽然把它加进来也不会有什么坏处,但排除掉它的传递依赖,可以为你的项目瘦身。 如果在用Gradle,你可以这样排除传递依赖:
1
2
3
compile("org.springframework.boot:spring-boot-starter-web") {
    exclude group: 'com.fasterxml.jackson.core'
}
Gradle总是会用最近的依赖, 如果在项目的构建说明文件里增加的依赖,比starter里面的版本新,会覆盖传递依赖引入的另一个依赖,如果使用新版本的依赖,指明版本号就可以了:
1
compile("com.fasterxml.jackson.core:jackson-databind:2.4.3")
因为这个依赖的版本比Spring Boot的Web起步依赖引入的要新,所以在Gradle里是生效的。但假如你要的不是新版本的Jackson,而是一个较早的版本呢?Gradle倾向于使用库的最新版本。因此,如果你要使用老版本的Jackon,则不得不把老版本的依赖加入构建,并把Web起步依赖传递依赖的那个版本排除掉:
1
2
3
4
compile("org.springframework.boot:spring-boot-starter-web") {
exclude group: 'com.fasterxml.jackson.core'
}
compile("com.fasterxml.jackson.core:jackson-databind:2.3.1")
不管什么情况,在覆盖Spring Boot起步依赖引入的传递依赖时都要多加小心。虽然不同的版本放在一起也许没什么问题,但你要知道,起步依赖中各个依赖版本之间的兼容性都经过了精心的测试。应该只在特殊的情况下覆盖这些传递依赖(比如新版本修复了一个bug)。
3.3 自动配置
在向应用程序加入Spring Boot时,有个名为spring-boot-autoconfigure的JAR文件,其中包含了很多配置类。每个配置类都在应用程序的Classpath里,都有机会为应用程序的配置添砖加瓦。
通过Spring Boot的起步依赖和自动配置,你可以更加快速、便捷地开发Spring应用程序。起步依赖帮助你专注于应用程序需要的功能类型,而非提供该功能的具体库和版本。与此同时,自动配置把你从样板式的配置中解放了出来。这些配置在没有Spring Boot的Spring应用程序里非常常见。
4 自定义配置
4.1 覆盖Spring Boot自动配置
覆盖自动配置很简单,就当自动配置不存在,直接显式地写一段配置。Java形式的配置意味着写一个扩展了WebSecurityConfigurerAdapter的配置类。
1
2
3
4
5
6
7
8
9
10
11
12
13
14
15
16
17
18
19
20
21
22
23
24
25
26
27
28

@Configuration                                                      //声明是一个配置类
@EnableWebSecurity                                                  //声明创建了一个WebSecurityConfiguration Bean
public class SecurityConfig extends WebSecurityConfigurerAdapter {  //扩展对应配置进行配置
    @Autowired
    private ReaderRepository readerRepository;

    @Override
    protected void configure(HttpSecurity http) throws Exception {
        http.authorizeRequests()
        .antMatchers("/").access("hasRole('READER')")
        .antMatchers("/**").permitAll()
        .and()
        .formLogin()
        .loginPage("/login")
        .failureUrl("/login?error=true");
    }

    @Override
    protected void configure(AuthenticationManagerBuilder auth) throws Exception {
    auth.userDetailsService(new UserDetailsService() {
        @Override
        public UserDetails loadUserByUsername(String username)throws UsernameNotFoundException {
            return readerRepository.findOne(username);
        }
        });
    }
}
4.1.1 自动配置的面纱
4.1.1.1 Spring boot是怎么加载自动配置的
Spring boot就是通过 @EnableAutoConfiguration加载自动配置的,我们的程序没有添加 @EnableAutoConfiguration, 因为 @SpringBootApplication包含了这个注解。
@EnableAutoConfiguration 中执行了 @Import(EnableAutoConfigurationImportSelector.class) (这个是1.5.22 的spring boot, 2.x已经使用AutoConfigurationImportSelector.class)。
AutoConfigurationImportSelector中加载META-INF/srping.factories提供的自动配置类。
4.1.1.2 如何生效需要的配置
Spring Boot自动配置自带了很多配置类,每一个都能运用在你的应用程序里。它们都使用了Spring 4.0的条件化配置,可以在运行时判断这个配置是该被运用,还是该被忽略。
大部分情况下,@Conditional*注解是覆盖自动配置的关键。如我们spring boot1.5.22中的默认Datasrouce
1
2
3
4
5
6
7
8
9
10
11
12
13
14
15
16
17
18
19
20
21
@Configuration
@ConditionalOnProperty(prefix = "spring.datasource", name = "jmx-enabled")
@ConditionalOnClass(name = "org.apache.tomcat.jdbc.pool.DataSourceProxy")
@Conditional(DataSourceAutoConfiguration.DataSourceAvailableCondition.class)
@ConditionalOnMissingBean(name = "dataSourceMBean")
protected static class TomcatDataSourceJmxConfiguration {

    @Bean
    public Object dataSourceMBean(DataSource dataSource) {
        if (dataSource instanceof DataSourceProxy) {
            try {
                return ((DataSourceProxy) dataSource).createPool().getJmxPool();
            }
            catch (SQLException ex) {
                logger.warn("Cannot expose DataSource to JMX (could not connect)");
            }
        }
        return null;
    }

}
dataSourceMBean()方法上添加了@Bean注解,在需要时可以配置出一个dataSourceMBean Bean。 但它上面还加了多个注解:
- @ConditionalOnProperty, 要求配置文件里面有spring.datasource
- @ConditionalOnClass, 存在org.apache.tomcat.jdbc.pool.DataSourceProxy类
- @Conditional, 满足DataSourceAvailableCondition的判断条件
- @ConditionalOnMissingBean注解,要求当前不存在dataSourceMBean的Bean时才生效。
如果有一个条件不满足,不会执行创建Bean了。
@ConditionalOnMissingBean的判断优先级是什么呢?Spring Boot的设计是先加载应用级配置,随后再考虑自动配置类。因此,如果你已经配置了一个JdbcTemplate Bean,那么在执行自动配置时就已经存在一个JdbcOperations类型的Bean了,于是忽略自动配置的JdbcTemplate Bean。
4.2 通过属性文件外置配置
为了微调一些细节,比如改改端口号和日志级别,便放弃自动配置,这是一件痛苦的事情。为了设置数据库URL,是配置一个属性简单,还是完整地声明一个数据源的Bean简单? Spring Boot自动配置的Bean提供了300多个用于微调的属性。当你调整设置时,只要在环境变量、Java系统属性、JNDI(Java Naming and Directory Interface)、命令行参数或者属性文件里进行指定就好了。
4.2.1 命令行参数
在命令行里运行阅读列表应用程序时,Spring Boot有一个ascii-art Banner。如果你想禁用这个Banner,可以将 spring.main.show-banner属性设置为false。有几种实现方式,其中之一就是在运行应用程 序的命令行参数里指定:
1
java -jar readinglist-0.0.1-SNAPSHOT.jar --spring.main.show-banner=false
4.2.2 配置文件
另一种方式是创建一个名为application.properties或者bootstrap.properityes的文件,包含如下内容:
spring.main.show-banner=false
或者,如果你喜欢的话,也可以创建名为application.yml或者或者bootstrap.yml的YAML文件,内容如下:
1
2
3
spring:
    main:
        show-banner: false
application.properties和application.yml文件能放在以下四个位置。
- 外置,在相对于应用程序运行目录的/config子目录里。
- 外置,在应用程序运行的目录里。
- 内置,在config包内。
- 内置,在Classpath根目录。
同样,这个列表按照优先级排序。也就是说,/config子目录里的application.properties会覆盖应用程序Classpath里的application.properties中的相同属性。 此外,如果你在同一优先级位置同时有application.properties和application.yml,那么application.yml里的属性会覆盖application.properties里的属性。
applicaton.yml和bootstrap.yml的区别:
Spring Cloud 构建于 Spring Boot 之上,在 Spring Boot 中有两种上下文,一种是 bootstrap, 另外一种是 application, bootstrap 是应用程序的父上下文,也就是说 bootstrap 加载优先于 applicaton。bootstrap 主要用于从额外的资源来加载配置信息,还可以在本地外部配置文件中解密属性。这两个上下文共用一个环境,它是任何Spring应用程序的外部属性的来源。bootstrap 里面的属性会优先加载,它们默认也不能被本地相同配置覆盖。
bootstrap.yml的典型应用场景:
- 使用Spring Cloud Config Server, 需要将spring.application.name 和spring.cloud.config.server.git.uri放再bootstrap.yml中
- 一些加密/解密的信息
4.2.3 设置环境变量
还可以将属性设置为环境变量。举例来说,如果你用的是bash或者zsh,可以用export命令:
1
export spring_main_show_banner=false
请注意,这里用的是下划线而不是点和横杠,这是对环境变量名称的要求。
4.2.4 优先级顺序
实际上,Spring Boot应用程序有多种设置途径。Spring Boot能从多种属性源获得属性,包括 如下几处。
- 命令行参数
- java:comp/env里的JNDI属性
- JVM系统属性
- 操作系统环境变量
- 随机生成的带random.*前缀的属性(在设置其他属性时,可以引用它们,比如${random.long})
- 应用程序以外的application.properties或者appliaction.yml文件
- 打包在应用程序内的application.properties或者appliaction.yml文件
- 通过@PropertySource标注的属性源
- 默认属性
这个列表按照优先级排序,也就是说,任何在高优先级属性源里设置的属性都会覆盖低优先级的相同属性。例如,命令行参数会覆盖其他属性源里的属性。
4.2.5 获取配置的方法
1
2
amazon:
    associateId: habuma-20
1
2
3
4
5
6
7
8
9
10
11
12
@Component
@ConfigurationProperties("amazon")                       //注入amzon前缀的属性
public class AmazonProperties {
    private String associateId;

    public void setAssociateId(String associateId) {     //associateId的Setter方法
        this.associateId = associateId;
    }
    public String getAssociateId() {
        return associateId;
    }
}
其他的配置:
- @Value从配置文件进行获取
- 通过Profile激活不同环境的配置
当自动配置无法满足需求时,Spring Boot允许你覆盖并微调它提供的配置。覆盖自动配置其实很简单,就是显式地编写那些没有Spring Boot时你要做的Spring配置。Spring Boot的自动配置被设计为优先使用应用程序提供的配置,然后才轮到自己的自动配置。
即使自动配置合适,你仍然需要调整一些细节。Spring Boot会开启多个属性解析器,让你通过环境变量、属性文件、YAML文件等多种方式来设置属性,以此微调配置。这套基于属性的配置模型也能用于应用程序自己定义的组件,可以从外部配置源加载属性并注入到Bean里。 c Spring Boot还自动配置了一个简单的白标错误页,虽然它比异常跟踪信息友好一点,但在艺术性方面还有很大的提升空间。幸运的是,Spring Boot提供了好几种选项来自定义或完全替换这个白标错误页,以满足应用程序的特定风格。
5 Actuator
spring boot 2和spring boot 1.x还是有一点区别的。其实spring boot 2.1.x 和2.0.x还是有区别的。
可以通过文档查看支持哪些endpoint,以及endpoint对应的内容。
- Spring boot 1.x 默认expose 的endpoint很多
- spring boot 2.x 默认值expose 2个endpoint—— “info”和“health”
- spring boot 2.x 访问endpoint的URI需要加上/actuator
- Spring boot 2.1.x启动的时候,已经不打印Map了。
- 支持的功能不一样, spring boot 2.1.0.RELEASE支持caches, 但是2.0.1.RELEASE不支持
5.1 使用方法
5.1.1 引入actuator
build.gradle中增加如下引用:
1
compile "org.springframework.boot:spring-boot-starter-actuator"
5.1.2 启用方法
缺省情况下,除了shutdown以外,所有的endpoints都是使能的,但是至少有 health 和 info 对外可以通过web的方式访问.
5.1.2.1 启用所有
application.yml 中增加如下内容:
1
2
3
4
5
management:
  endpoints:
    web:
      exposure:
        include: "*"
5.1.2.2 启用指定对外可以访问的endpoint
如果指定metrics, env, 在application中增加如下内容:
1
2
3
4
5
management:
  endpoints:
    web:
      exposure:
        include: metrics, env
5.1.2.3 actuator支持跨域
如果起一个web服务调用actuator的url存在跨域的问题,需要配置actuator支持跨域,如果支持所有源访问,配置如下:
1
2
3
4
5
6
7
8
management:
  endpoints:
    web:
      exposure:
        include: "*"
      cors:
        allowed-origins: "*"
        allowed-methods: "*"
默认actualtor是禁止跨域的,只有代开cors.allowed-origins才支持跨域访问。
5.2 使用方法
查看支持endpoint, 然后根据href进一步访问
1
http://${ip}:${port}/actuator/
支持caches(需要spring boot 2.1.0.RELEASE)和info的返回结果,通过json格式化后的结果:
1
2
3
4
5
6
7
8
9
10
11
12
13
14
15
16
17
18
19
20
{
    "_links":{
        "self":{
            "href":"http://127.0.0.1:8083/actuator",
            "templated":false
        },
        "caches-cache":{
            "href":"http://127.0.0.1:8083/actuator/caches/{cache}",
            "templated":true
        },
        "caches":{
            "href":"http://127.0.0.1:8083/actuator/caches",
            "templated":false
        },
        "info":{
            "href":"http://127.0.0.1:8083/actuator/info",
            "templated":false
        }
    }
}
6. 项目启动资源初始化
在项目启动的时候经常需要做一些初始化的操作,比如初始化线程池。实现CommandLineRunner 接口的bean会在所有 Spring Beans都初始化之后,SpringApplication.run()之前执行,非常适合在应用程序启动之初进行初始化工作。
6.1 编写启动代码
6.1.1 启动类
1
2
3
4
5
6
7
8
9
10
11
12
13
import org.springframework.boot.SpringApplication;
import org.springframework.boot.autoconfigure.SpringBootApplication;

@SpringBootApplication

public class DemoApplication {

    public static void main(String[] args) {
        System.out.println("1: The service begin to start");
        SpringApplication.run(DemoApplication.class, args);
        System.out.println("3: The service has been started");
    }
}
6.1.2 初始化类
1
2
3
4
5
6
7
8
9
import org.springframework.boot.CommandLineRunner;
import org.springframework.stereotype.Component;

@Component
public class CommandListenerTest implements CommandLineRunner {                         // 实现CommandLineRunner接口
    public void run(String ...args) {
        System.out.println("2: CommandLine Runner initializing");
    }
}
1
2
3
4
5
6
7
8
9
10
11
import org.springframework.boot.CommandLineRunner;
import org.springframework.core.annotation.Order;
import org.springframework.stereotype.Component;

@Component
@Order(1)                                                                              // 设置执行顺序
public class CommandListenerTestOrder1 implements CommandLineRunner {
    public void run(String ...args) {
        System.out.println("2: CommandLine Runner initializing -- order 1");
    }
}
6.1.3 输出
1: The service begin to start

  .   ____          _            __ _ _
 /\\ / ___'_ __ _ _(_)_ __  __ _ \ \ \ \
( ( )\___ | '_ | '_| | '_ \/ _` | \ \ \ \
 \\/  ___)| |_)| | | | | || (_| |  ) ) ) )
  '  |____| .__|_| |_|_| |_\__, | / / / /
 =========|_|==============|___/=/_/_/_/
 :: Spring Boot ::        (v2.1.3.RELEASE)

2019-03-18 19:36:57.544  INFO 14132 --- [           main] com.example.demo.DemoApplication         : Starting DemoApplication on DESKTOP-VFA7NRS with PID 14132 (E:\project\edgex\demo\target\classes started by Admin in E:\project\edgex\demo)
2019-03-18 19:36:57.548  INFO 14132 --- [           main] com.example.demo.DemoApplication         : No active profile set, falling back to default profiles: default
2019-03-18 19:36:58.016  INFO 14132 --- [           main] com.example.demo.DemoApplication         : Started DemoApplication in 0.782 seconds (JVM running for 1.65)
2: CommandLine Runner initializing -- order 1
2: CommandLine Runner initializing -- order2
2: CommandLine Runner initializing
3: The service has been started
6.2 总结
- 添加@Order注解的实现类优先执行
- @Order()的值越小越早执行
7. 热加载
使用idea开发springboot项目,每次修改之后都重新关闭再开启项目,比较繁琐。可以通过热部署的方式加快开发进度。spring为开发者提供了一个名为spring-boot-devtools的模块来使Spring Boot应用支持热部署,提高开发者的开发效率,无需手动重启Spring Boot应用。
7.1 添加依赖
1
2
3
4
5
6
7
8
9
configurations {
    developmentOnly
    runtimeClasspath {
        extendsFrom developmentOnly
    }
}
dependencies {
    developmentOnly("org.springframework.boot:spring-boot-devtools")
}
不用担心热加载会部署到生产环境:
- 当运行整包的应用时,Developer tools 会自动关闭。 当通过java -jar或者其他classLoader加载时,会被当作一个生产环境的应用。
- 重新打包的项目不会包含Developer tools。
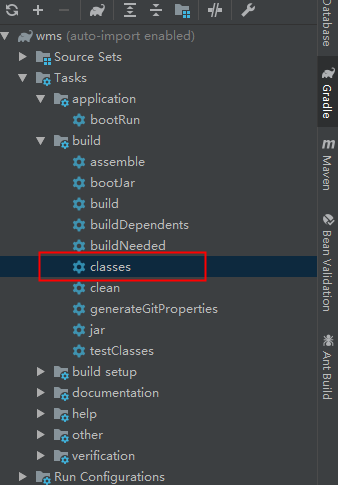
7.2 使用方法
双击classes,修改就被加载了。
可以设置自动编译加载,觉得还是手动触发比较好。
8. 有用的spring boot 配置
8.1 context-path
1
2
server:
    context-path= # Context path of the application.
应用的上下文路径,也可以称为项目路径,是构成url地址的一部分。 配置server.context-path时,项目的url会增加在port后面增加配置的context-path(localhost:port/${context-path}/mqcp/convert )
9 spring boot支持多配置文件
在spring boot的开发中,会有不同的配置,例如日志打印,数据库连接等,开发,测试,生产每个环境可能配置都不一致, spring boot支持通过不同的profile来配置不同环境的配置。
推荐方案9.2 使用多个yml配置文件进行配置属性文件。
9.1 方案1 —— 通过不同的profile来配置属性文件:
application.yml配置如下:
# 公共配置
spring:
  profiles:
    active: dev

# dev 环境配置
---
spring:
    profiles: "dev"
    datasource:
        url: jdbc:sqlserver://127.0.0.1:1433;DatabaseName=dev_db
        username: sa
        password: db-password

# 测试环境配置
---
spring:
    profiles: "test"
    datasource:
        url: jdbc:sqlserver://192.168.1.2:1433; DatabaseName=test_db
        username: sa
        password: db-password

# 生产环境配置
---
spring:
    profiles: "production"
    datasource:
        url: jdbc:sqlserver://192.168.12.104:1433;DatabaseName=production_db
        username: sa
        password: db-password
非常简单的配置,application.yml文件分为四部分,使用一组(—)来作为分隔符,第一部分,为通用配置部分,表示三个环境都通用的属性
后面三段分别为,开发,测试,生产,都用spring.profiles指定了一个值(开发为dev,测试为test,生产为pro),这个值表示该段配置应该用在哪个profile里面,
上面的XXX是每个环境的 spring.profiles对应的value,通过这个,可以控制本地启动调用哪个环境的配置文件,例如:
spring:
    profiles:
        active: dev
加载的,就是开发环境的属性,如果dev换成test,则会加载测试环境的属性,生产也是如此,
PS:如果spring.profiles.active没有指定值,那么只会使用没有指定spring.profiles文件的值,也就是只会加载通用的配置
如果是部署到服务器的话,我们正常打成jar包,发布是时候,采用:
–spring.profiles.active=test或者pro 来控制加载哪个环境的配置,完整命令如下:
java -jar xxxxx.jar --spring.profiles.active=test  表示加载测试环境的配置

java -jar xxxxx.jar --spring.profiles.active=pro  表示加载生产环境的配置
1.2 使用多个yml配置文件进行配置属性文件:
如果是使用多个yml来配置属性,我们则可以这么使用,通过与配置文件相同的明明规范,创建application-{profile}.yml文件,将于环境无关的属性,放置到application.yml文件里面,可以通过这种形式来配置多个环境的属性文件,在application.yml文件里面指定spring.profiles.active=profiles的值,来加载不同环境的配置,如果不指定,则默认只使用application.yml属性文件,不会加载其他的profiles的配置
application.yml 设置缺省为
spring:
    profiles:
        active: "dev"
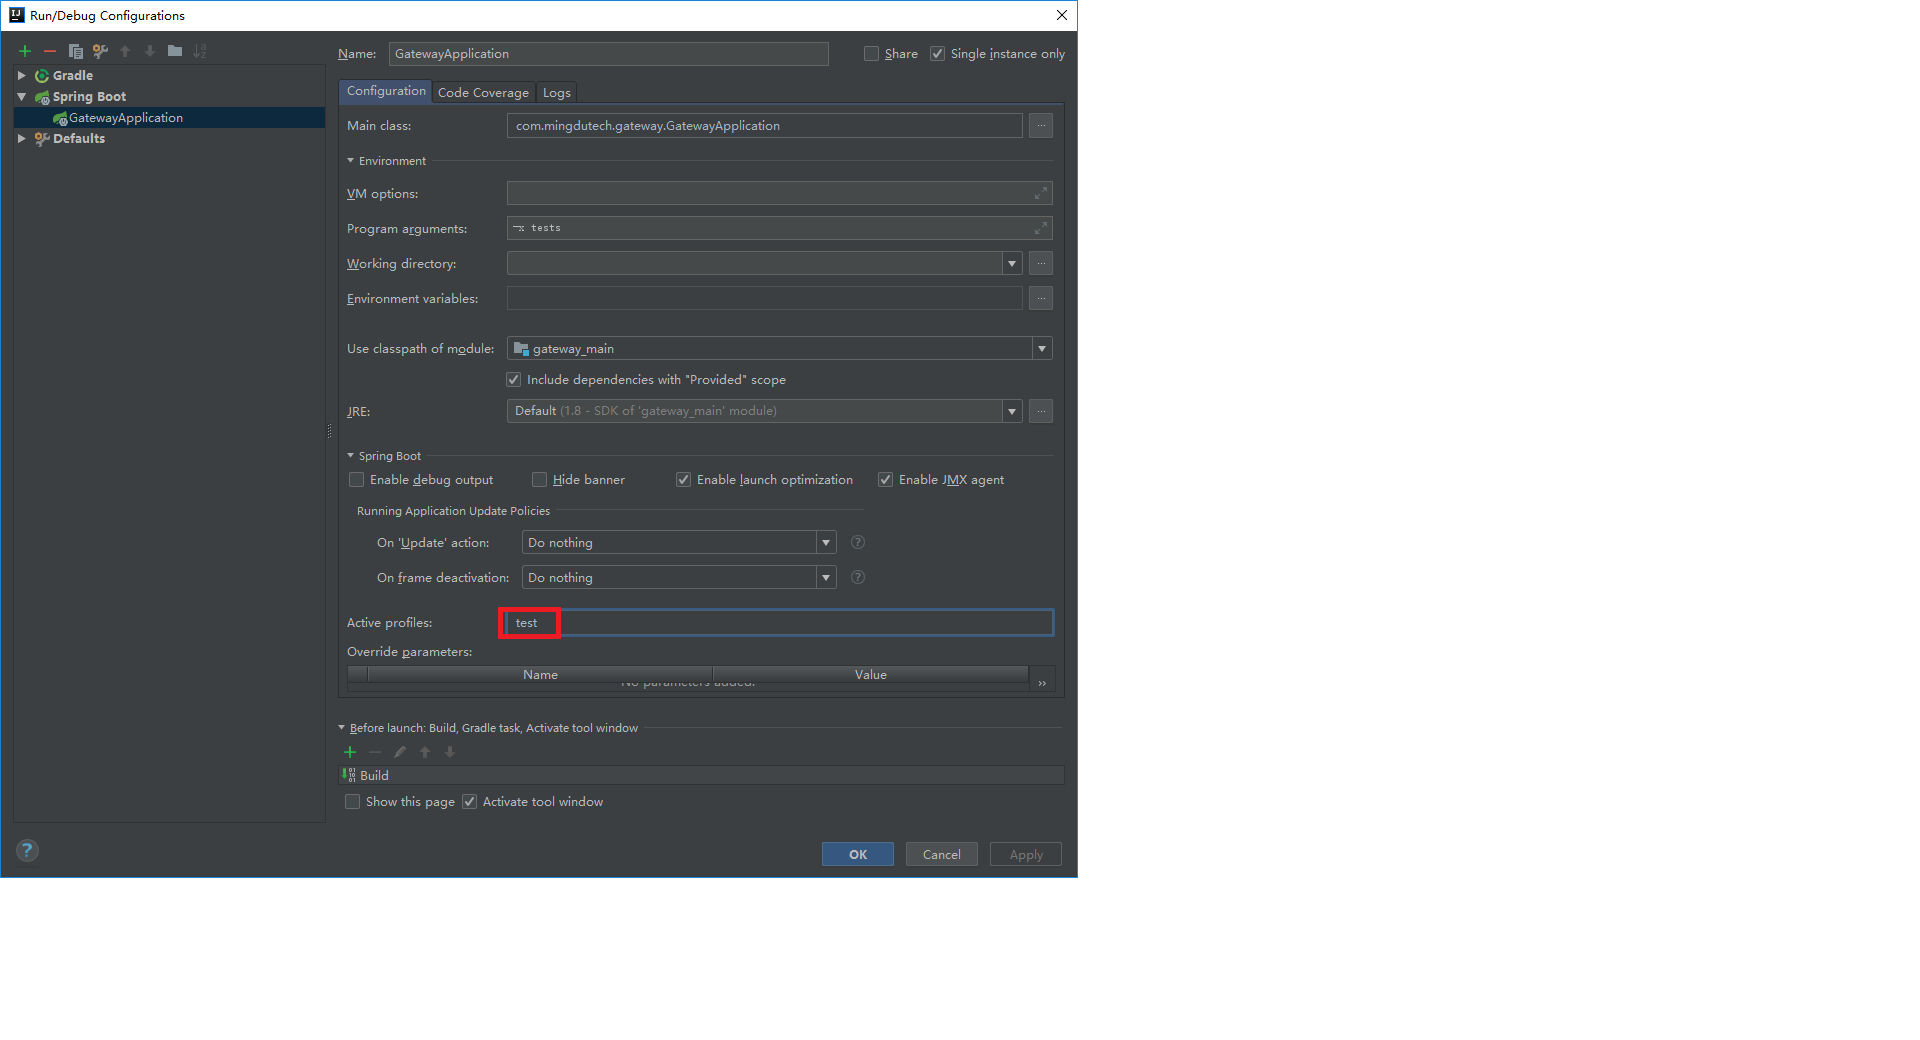
1.3 idea 选择启动的配置文件